Lamp Post

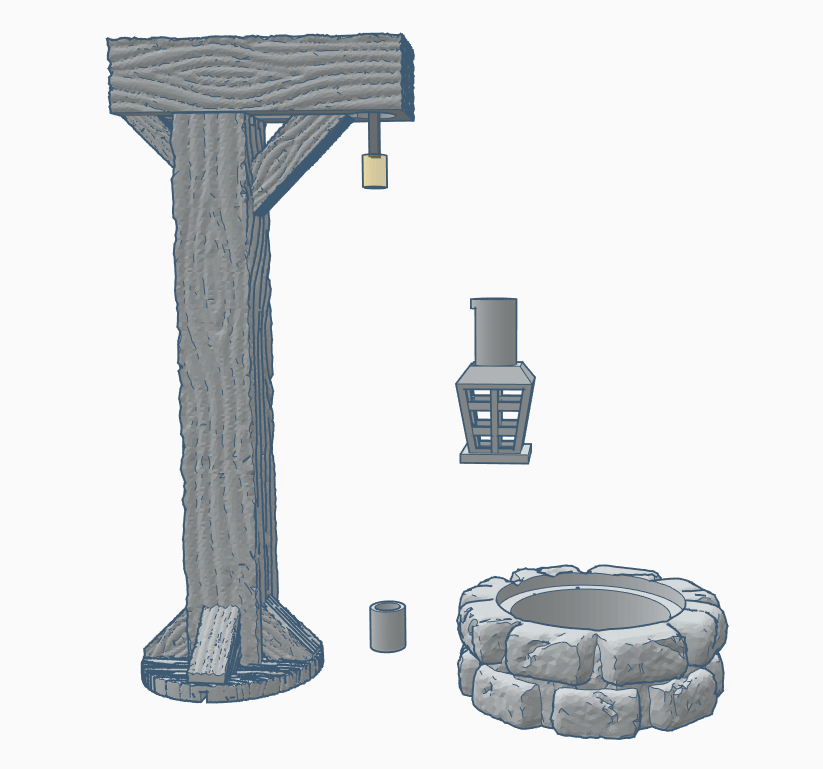
The lamp post consists of the main post with the LED and switch, the LED lantern cover, base, and an optional LED diffusion sleeve.
UPDATED, MAY 2021: If your lamp post arrives with the lantern cover already installed, please use the included paint protector to shield the LED from paint. The paint protector is a 2″ piece of resin with an opening on one end, which can be slipped over the LED to prevent paint from getting on it.
It is recommended that assembly be done after painting.
We paint our lamp posts using the following steps, with drying between each step:
- COVER LED with tape
- Spray-on flat brown primer
- Heavy dry brush of raw sienna
- Light dry brush of 60/30 raw sienna + titanium white (or Apple Barrel “light mocha”)
- Random splotchy brush of burnt sienna to add character
For the lantern cover:
- Spray-on flat black primer
- Solid coverage of Vallejo Brassy Brass
For the stone base:
- Spray-on flat black primer
- Heavy dry brush of Liquitex Neutral Gray No. 5
- Highlight dry brush of titanium white

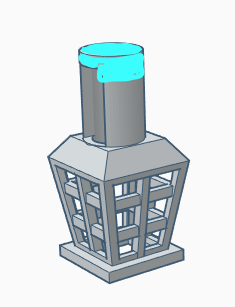
After painting and final drying, apply a small amount of glue (we use Gorilla Glue Gel) to the top of the lantern cover, as show in the diagram (the blue coloring indicates where the glue should go).
If this is your first time assembling a lamp post, you may want to try fitting the cover before adding the glue. See the next step for fitting.

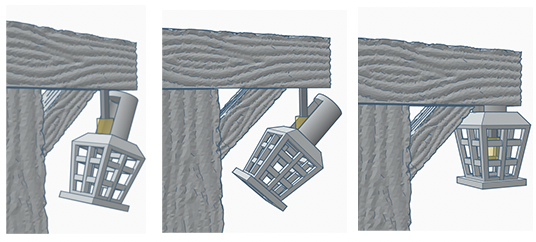
With the lantern cover at an angle, carefully slide the LED inside, then rotate the lantern cover so that the flat round top is upward. Press the cover in to the top beam of the lamp post and hold it there for 10 seconds so that the glue can bond.

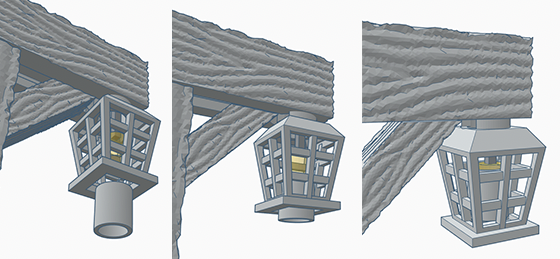
Optionally, to diffuse the LED light, carefully push the diffuser in to the bottom of the lantern cover so that it slips on to the LED. You may need to add a small amount of glue inside the diffuser to secure it to the LED.

