← Back to Instructions
-
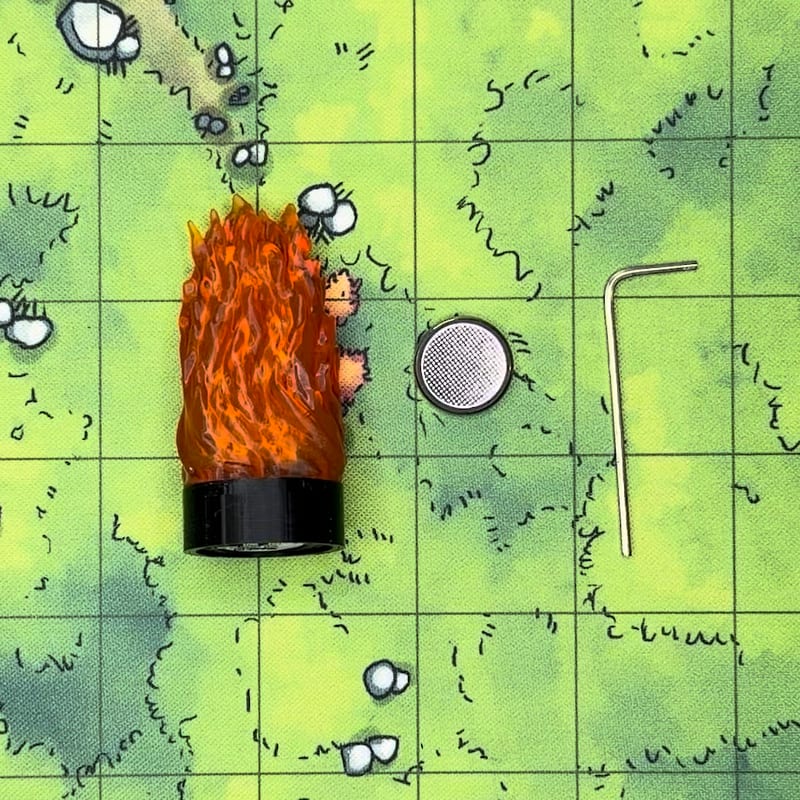
1. Replacing the Battery
The following steps will guide you through the replacement of the battery in your Teanylight 2 miniature. Before you begin, you will need the hex (“allen”) wrench which was included with your order (or any other 1.5mm hex wrench), and a replacement battery (typically either CR1632 or CR2032, the size is indicated on the label of the TL2 battery door).
-
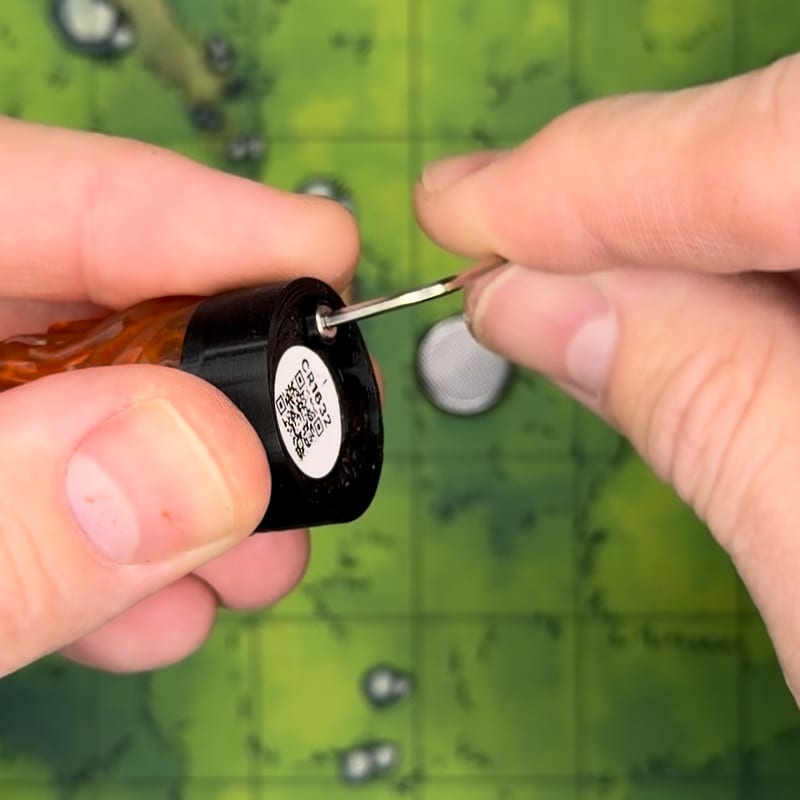
2. Unscrew the Battery Door
The battery door is held in place by a small hex screw. Unscrew it using the hex wrench, until the battery door is freed (approx 1/16th inch).
-
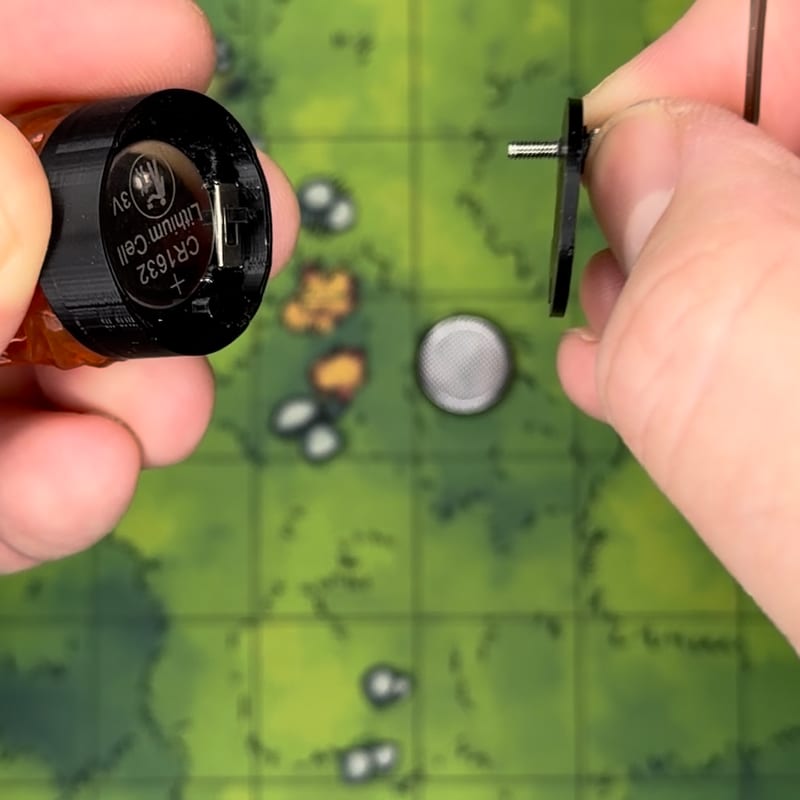
3. Remove the Battery Door
Once unscrewed, use the screw as a handle to remove the battery door from the TL2.
-
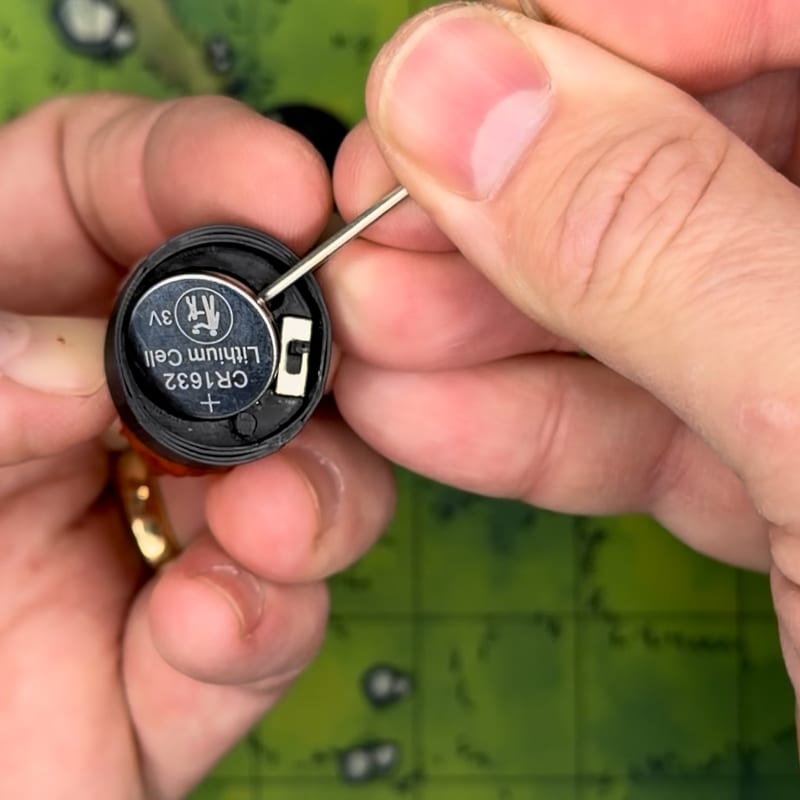
4. Remove the Old Battery
Using the hex wrench, insert one end in to the hole to the left of the on/off switch, and lift the old battery out. Set it aside and dispose of it according to the directions of your local waste management company.
-
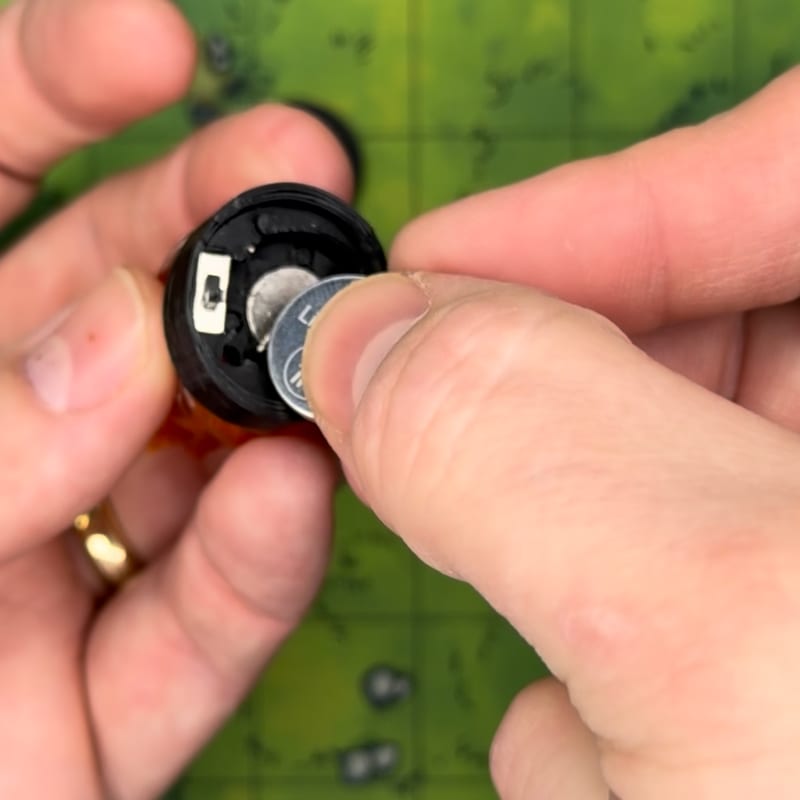
5. Insert the New Battery
Insert the new battery at an angle toward the wire to the right of the on/off switch.
-
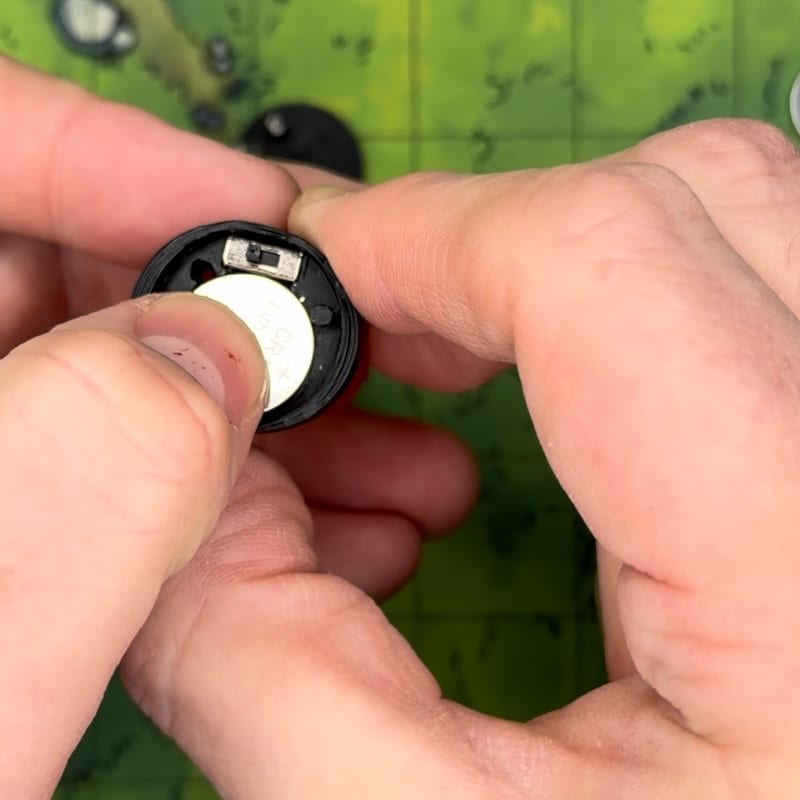
6. Secure the New Battery
Firmly press the battery until it is flush with the TL2. At this point, you should turn the TL2 on to ensure that the battery is correctly installed.
-
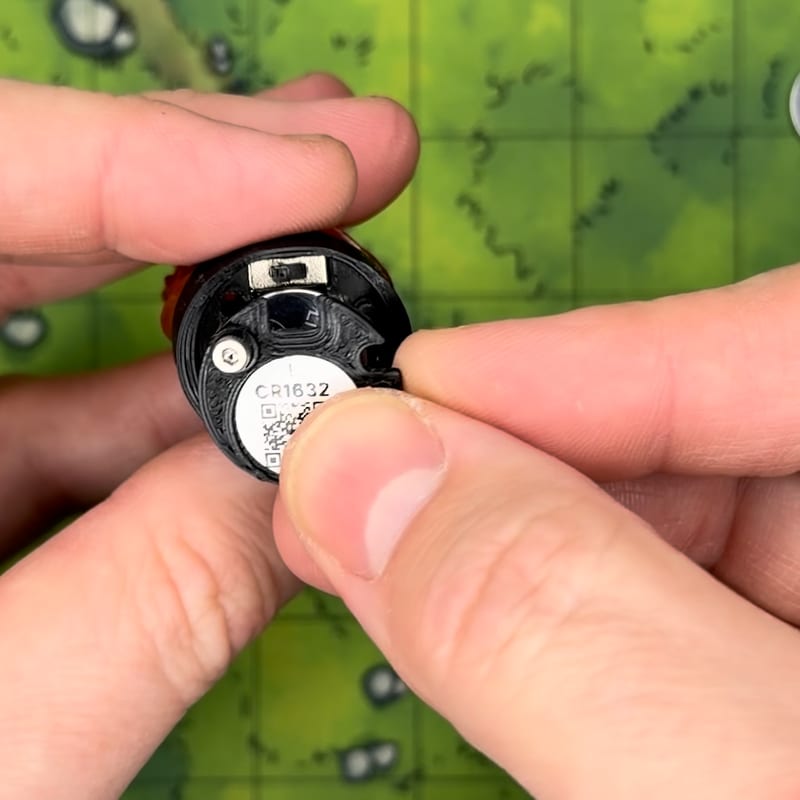
7. Reinstall the Battery Door
Line up the battery door so that the screw goes in the hole to the left of the on/off switch, and the alignment notch on the righthand side lines up with the alignment peg to the right of the switch.
-
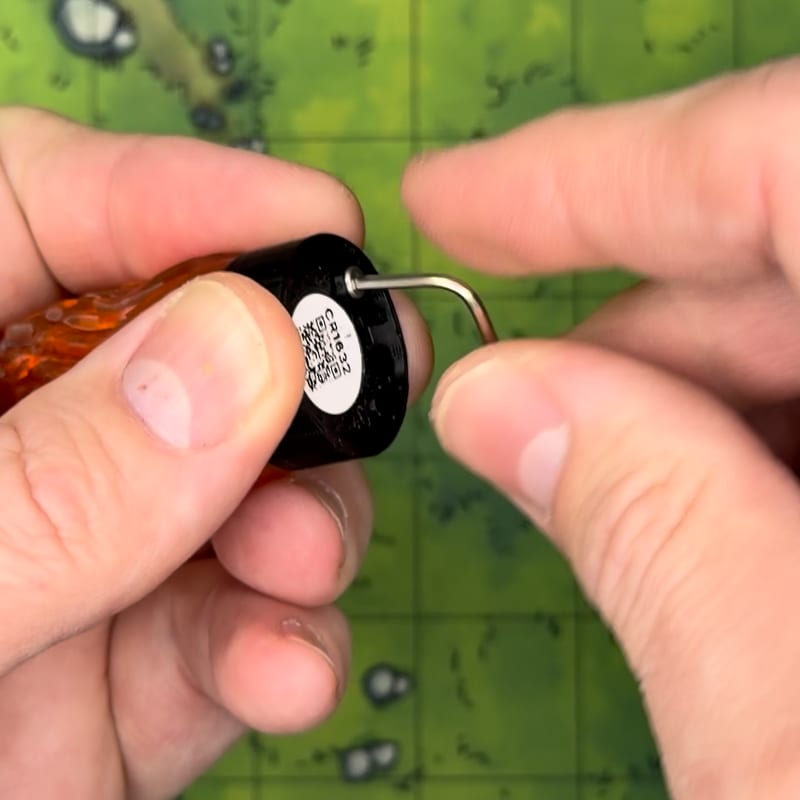
8. Secure the Battery Door
Use the hex wrench to tighten the screw. Tighten until it will not tighten further using light force. Do not overtighten the screw or you may damage your miniature.